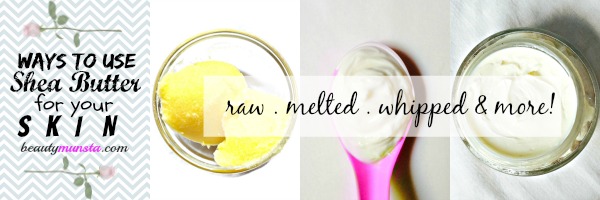
If you’ve just bought raw shea butter and don’t know how to start using it on your skin, then read on because in this post, I talk about 6 different ways you can manipulate the raw and hard unrefined shea butter to make it suitable for smooth application. But first, let’s look at a few shea butter benefits for the skin in particular:
Shea Butter Benefits for Skin
There are so many beauty benefits of shea butter but these ones will quickly become your favourite reasons to keep on using this wonder beauty product:
• Moisturizes Skin
• Treats Acne
• Heals Chapped Lips
• Natural Shaving Aid
• Scar Reducer
Find out more shea butter benefits for skin here:
► 15 Shea Butter Benefits for Skin
How to Use Raw Shea Butter for Skin
Many diy shea butter recipes tell you to first melt the shea butter before whipping but there are some other ways you can use it for skin for example: by mashing, whipping or blending it. Here are some ways you can use shea butter in your skin care regimen, to moisturize, soothe and nourish your skin:
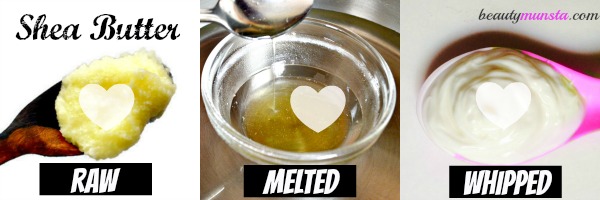
1. As It Is
One of the best things about shea butter is that it melts at body temperature and doesn’t clog up the pores – it simply sinks in and nourishes. Shea butter is quickly absorbed into the skin, making it look instantly supple and radiant. It won’t leave an unpleasant oily residue on your skin – just a thin protective lipid layer that will help seal in moisture and ward off pollution, germs and other impurities floating in the environment.
To use raw shea butter as it is, just get a pea sized amount, rub it between your fingers and gently massage it on your face, starting with the cheeks. The heat from rubbing it between your fingers automatically breaks down the shea butter into oil form.
► 3 Shea Butter Face Mask Recipes for Supple Skin
2. Warm It
Shea butter is known to melt at fairly low heat so while warming shea butter for use, you will want to keep the flame on low. The final product should be slightly melted butter. Don’t melt your shea butter completely while warming. Use warmed shea butter straight away on your dry skin for a soothing relief that will also calm any itchiness. Using slightly warmed shea butter will help in exfoliating sensitive dry skin by softening the dead cells/flakes on the skin’s surface. There are two ways of warming shea butter and the first one is to just place the jar on a sunny window sill. The second way is to pop the shea butter jar in a bowl of warm water which will heat it up, leaving it slightly melted.
3. Blend It
I know they say you can’t whip shea butter with a blender because the heat from the motor will melt it up and prevent it from forming a whipped meringue-like consistency. But I’ve used a tiny blender with success – you can find my blended shea body butter here. Granted the blender won’t fluff up your shea butter the way an electric mixer will, but it’ll definitely help you make good body butter if you use the right technique + ingredients. There are definitely some good uses for blended raw shea butter such as using it to make a shea butter facial cream, lotion, body butter & more. A blender can also be a handy tool to help soften & liquefy the shea butter, when you’re making face masks/hair masks.
Where to Get Raw Shea Butter
.
4. Mash It
This is a quick & simple way to make hard chunks of raw shea butter easy for application. Here’s how to do it: Place a small chunk of shea butter in a bowl and use force to mash it with a fork. When it’s mashed, add 1 tbsp of a base oil such as argan or coconut oil and mash again. By 2 minutes or less, you’ll have a soft & creamy shea butter mix! You can make a bigger batch for hair using a larger amount but you’ll also need a lot of patience, a strong arm and enough free time. Just think of it as a mini-arm workout!
5. Whip It
DIY shea butter skin and hair care recipes always require you to have an electric mixer to whip up the shea butter to a fluffy cream. And it’s the most popular way of using shea butter – just melt & whip. Here’s how: add a base ingredient such as fractionated coconut oil/ pure aloe vera gel to melted shea butter and just whip it to high heaven.
► 15 Easy DIY Skin Care Recipes with Shea Butter
6. Melt It
If you want to make a shea butter serum/facial mask which requires the shea butter to be easily spreadable, smooth and in liquid form, you can melt it. This melting method is not going to work if you aren’t going to use the liquefied shea butter immediately like in a face mask/as a serum. This is for obvious reasons – if you leave melted shea butter aside for some time, it’s definitely going to harden up again. However, if you mix some base/carrier oils such as safflower oil in the melted shea butter then your shea butter will stay liquid. There are two common ways of melting shea butter – the first one being using a microwave. The second method is known as the double boiler method, where you place a glass bowl/ of raw shea butter in a sauce pan of hot water and put it on a low flame till the shea butter melts completely to a thick liquid.
Make an anti aging shea butter serum by melting just 2 tbsp of shea butter with 1 tbsp of your choice of carrier oil. Choose a light oil like safflower or grapeseed because heavier oils like olive oil can tend to make skin really greasy when combined with shea butter. Add 2 to 5 drops of an anti aging essential oil that blends well with shea butter and mix thoroughly to make a simple facial serum. Store it in a small glass dropper bottle and massage 3 to 5 drops on your face nightly.
My Favorite Tried & Tested Shea Butter Recipes Ebook
Do you love shea butter and want to make your own beauty products with it?! Check out this ebook “My Favorite Tried & Tested Shea Butter Recipes for Luscious Skin & Hair” for 30 awesome recipes, complete with step-by-step instructions, beautiful pictures and other valuable shea butter info!

your links look interesting but none of them seem to work. There are database connection problems……
I love Shea butter but can it clean stretch marks?