
A scar happens when a wound or cut heals. There are many types of scars, such as those from chicken pox, boils, bug bites, cuts and also surgery.
Surgery scars are also of many types: hypertrophic scars, keloid scars and contracture scars. Hypertrophic scars happen when the scar grows in height and rises above the level of skin. Now when the scar continues to grow and even reaches out of the border of the surgery incision, it is called a keloid scar. Contracture scars happen when a person suffers a large severe burn which causes painful tightening of the skin that may impair movement.
While scarring is a normal result of wound healing, surgery scars take a lot more time to heal and are more visible than other scars such as a small kitchen accident with a knife or shaving cut.
However, you can help heal the scar and prevent it from being very visible by using natural remedies. Like shea butter!
Using Shea Butter for Surgery Scars
Shea butter is an all-natural plant based substance extracted from the dried nuts of the African Shea Tree. The nuts are picked out of Shea fruits and dried under the sun. Then they are boiled to extract a fatty ‘butter’ that has many nutritious and healing properties for the skin, hair & general body. Here are some of the benefits of shea butter for scars:
- Intensely moisturizes and lubricates skin
- Nourishes skin
- Rich in vitamin A, E, K and F which are good for scar healing
- Boosts collagen production
- Promotes skin cell renewal
- Fights off cell damaging free radicals
- Rejuvenates skin
- Aids in skin lightening
- And others
Now that we know the benefits of shea butter for scars, let’s look at how to use it for surgery scars, in particular.
Where to Get Shea Butter
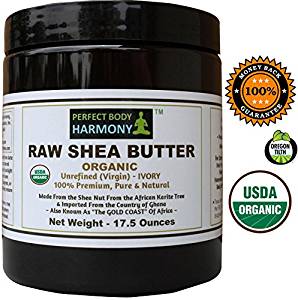
Always look for 100% pure unrefined shea butter. This is the one that has all its nutrients and healing abilities intact. I recommend Perfect Body Harmony’s 100% pure raw unrefined and organic shea butter. It comes in a UV protectant jar that can keep your shea butter fresh for long.
How to Use Shea Butter for Surgery Scars
The recipe below is something powerful that you can use daily to heal your scar. It contains shea butter as well as other scar-fading ingredients such as cocoa butter that can nourish the skin and promote healing. Try it out and see your scar improving by miles!
DIY Scar-Fading Formulation with Shea Butter

What you need
- ¼ cup shea butter (where to get it)
- 2 tbsp cocoa butter (where to get it)
- 2 ½ tbsp aloe vera gel (where to get it)
- 1 vitamin E capsule (where to get it)
- 2 tsp raw manuka honey (where to get it)
- 10 drops frankincense essential oil (where to get it)
- 10 drops helichrysum essential oil (where to get it)
- 10 drops lavender essential oil (where to get it)
- Double boiler (where to get it)
- High speed blender (where to get it)
- Sterilized storage container (where to get it)
Directions
- Begin by gently melting the shea butter and cocoa butter using a double boiler.
- Once the two ingredients have melted down to liquid form, pour the mixture into your blender.
- Place the blender jar in the refrigerator for 15 minutes to cool down and partially solidify.
- When the time is up, get it out, add the manuka honey, aloe vera gel and vitamin E oil (by snipping off the edge of the capsule and squeezing out the oil) and start blending it.
- Pour the blended mixture into your sterilized container. Now drop the essential oils and stir well using a chopstick.
- Let the formulation harden in the refrigerator for an hour before use.
- To use, massage the formulation into your scar then use your two fingers, slowly but firmly pull the scar, from the middle gently outwards. This will help break up scar tissue.
- Repeat this for 3-6 months every night.
Shea butter is a brilliant natural remedy for assisting in scar healing and fading. Please continue using it consistently through the above recipe to see good results! Remember to also eat lots of fresh fruits, consume supplements as directed by your doctor and drink enough water to help your body heal the scar.


Leave a Reply