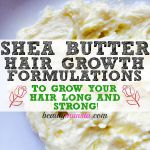
Find 3 exciting Shea Butter Hair Conditioner recipes for natural hair in this post!
Many people add shea butter to their store-bought hair conditioners and use it to deep condition and soften hair. But how about foregoing all the nasties in chemical products and making your own shea butter hair conditioner, with healing oils, herbs and other natural ingredients?!
If you’re a serious DIY naturalista, then you totally understand what I mean! Let’s get started with these 3 shea butter hair conditioner recipes that really work!
Shea Butter Hair Conditioner Recipes for Natural Hair
1. Shiny Strands: Coconut Milk Shea Butter Hair Conditioner
Get shiny lustrous hair with this coconut milk shea butter hair conditioner recipe, which is my best shea conditioner recipe so far! Coconut milk is the star ingredient in this recipe and it’s full of nourishing nutrients for luscious hair. I’ll also be using jojoba and vitamin E oil as well:
Ingredient Profile
➝ Coconut Milk – Coconut milk has been used for ages in South East Asia and the Philippines to condition the hair and make it appear glossy and shiny.
➝ Jojoba Oil – Jojoba oil promotes shine and luster without weighing the hair down.
➝ Vitamin E Oil – Vitamin E is a powerful hair tonic which can help treat damaged hair as well as prevent split ends and hair breakage.
Ingredients
- 1/2 cup of coconut milk (where to get it)
- 2 teaspoons of soft unrefined shea butter (where to get it)
- 1 teaspoon of jojoba oil (where to get it)
- 1/2 teaspoon of vitamin E oil *optional* (where to get it)
- 5 drops of lavender essential oil (where to get it)
- High speed blender (where to get it)
- Applicator bottle for storage (where to get it)
Directions
- Put all the ingredients except the lavender essential oil into a high speed blender. Blend away for a few seconds until you get a thick white mixture.
- Pour it into an clean container, add 5 drops of lavender essential oil and mix well. We’re adding the essential oil last because we don’t want its strong scent to cling to the blender!
- Store the hair conditioner in your bathroom cabinet. Use about 1-2 tsp on your hair length. It lasts about a week outside! Storing in the refrigerator prolongs the shelf life.
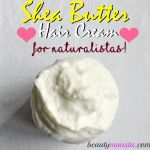
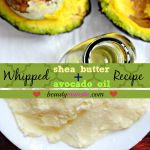
2. Hair Strengthening: Avocado Oil Shea Butter Hair Conditioner
This shea butter hair conditioner contains two fatty acid-rich hair enhancing goodies: avocado oil and shea butter. It also contains one of the best essential oils for hair growth and healthy hair: rosemary essential oil! Check out their benefits below:
Ingredient Profile
➝ Avocado Oil – Extracted from the seed of avocado, avocado oil is filled with healthy fatty acids including oleic acid which will soften dry and tough hair, making it more manageable.
➝ Rosemary Essential Oil – Rosemary essential oil is the best essential oil for healthy hair and it offers so many benefits including strengthening the hair strands and preventing damage and breakage.
Ingredients
- 1/2 cup of raw shea butter (where to get it)
- 2 teaspoons of avocado oil (where to get it)
- 7 drops of rosemary essential oil (where to get)
- Double boiler (where to get it)
- Hand mixer (where to get)
- Amber jar for storage (where to get it)
Directions
- Gently warm the raw shea butter in a double boiler until soft. Don’t make let it completely melt to liquid form or else it can’t be whipped.
- Add the avocado oil and stir well.
- Wait for it to cool down for a couple of minutes by placing it in the refrigerator. Remove it when it has partly solidified.
- Using a hand mixer, blend the ingredients until the mixture forms stiff peaks. This will take about 5-10 minutes. Remember to keep scraping down the sides while whipping so you mix everything up.
- That’s it! Your final mixture should look like whipped cream.
- Transfer to a clean jar and store in a cool dry place. Do not get water into it. This conditioner lasts more than 3 months!
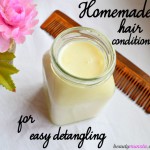
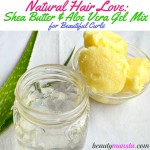
3. Easy De-tangling: Shealoe Hair Conditioner Recipe
Shealoe is absolutely luxurious and very nourishing and healing for natural hair. In this recipe, I basically combined shealoe with a few favourite carrier oils and lavender essential oil for its hair soothing benefits and also for fragrance. Check out the benefits of the ingredients used!
Ingredient Profile
➝ Grapeseed Oil – With its light and thin consistency, grapeseed oil is perfect in that it can easily penetrate the hair shaft and nourish the scalp and it won’t make your hair look greasy.
➝ Safflower Oil – Another light oil, safflower oil is readily absorbed by the hair and helps condition the hair, making it easier to de-tangle.
➝ Aloe Vera – Many people use aloe vera as a styling product because it provides hold and helps decrease frizz. It’s also a great emollient and acts as a sealant by locking in moisture in dry hair strands.
➝ Ylang Ylang Essential Oil – Ylang ylang essential oil is one of my favorite essential oils for hair! It softens hair and makes it silky by deep conditioning it. Bonus: It also has a long lasting scent for gorgeous smelling hair!
Ingredients
- 1/4 cup of raw shea butter (where to get it)
- ¼ cup of pure aloe vera gel (where to get it)
- 2 teaspoons of grapeseed oil (where to get it)
- 1 teaspoons of safflower oil (where to get it)
- 6 drops of ylang ylang essential oil ( where to get it)
- Hand mixer (where to get it)
- Amber jar for storage (where to get it)
Directions
- If your raw shea butter is hard, start by softening it by placing it in a heat safe container and immersing it in a bowl of hot water. It doesn’t have to be melted completely, but should be soft enough to mix easily.
- Add the grapeseed oil and safflower oil then using a hand mixer, whip the ingredients on low to medium speed until it turns creamy.
- Slowly add the pure aloe vera gel while whipping with a hand mixer until fully incorporated. Make sure to mix very well to a smooth consistency.
- Transfer the mixture to a clean container and stir in the ylang ylang essential oil. Store in a clean dark place. Just like the avocado shea butter conditioner above, this one lasts more than 3 months as well! 🙂
My Favorite Tried & Tested Shea Butter Recipes Ebook
Do you love shea butter and want to make your own beauty products with it?! Check out this ebook “My Favorite Tried & Tested Shea Butter Recipes for Luscious Skin & Hair” for 30 awesome recipes, complete with step-by-step instructions, beautiful pictures and other valuable shea butter info!
Buy Shea Moisture Raw Shea Butter Restorative Conditioner!
Don’t have time to make your own shea butter conditioner? Then you’ve got to try out Shea’s Moisture’s Raw Shea Butter Restorative Conditioner. It leaves your hair soft and silky for easy de-tangling. It also helps repair dry damaged hair so I definitely recommend it to anyone who’s suffering from heat damaged hair!

I love the coconut milk one – I add less coconut milk to make it thicker ad it really does make my hair shiny. Using it once/twice a week is good for those with protein sensitive hair.
Would like to try the first recipe, is this a leave in conditioner?
Hi Mykia,
The first recipe can’t be used as a leave-in because of the coconut milk but the last two can be!
Thank you!
How would you apply the second one?
Hey Stacey,
Just apply a tiny amount on your hair length, leave it on for a couple of minutes then rinse off.
I made the third one (shaealoe) and I’m wondering if I used too much. It left my hair strands sticking together like a gel and feeling pretty greasy. Is there an ingredient that you suggest adding to ‘dilute’ it a bit? Or any other suggestions?
Hi Tiffani
Oh no 🙁 Maybe you did use too much. Is your hair thin/fine? If so, then you really should use a tiny amount. Hmm..to cut down the greasiness I’d suggest adding a little arrow root powder/corn starch. Or you can add a hydrosol like rose hydrosol and blend it again. Add 2-5 tsp though, you want everything to mix up together without separating. Add the hydrosol little by little while blending the conditioner in a high speed blender. I’m sure any of the two remedies will work for you! Good luck!
The third recipe ,do you store it in the fridge?
You don’t have to but to lengthen its shelf life you can!
I made the 2nd one and it turned out great, but solidified more after I used it and now it’s hard. Is it supposed to be? How do you keep it the creamy texture it was when you finish whipping it?
fat is a challenge In our fast and busy life we didn’t care how to about we lose belly fat coz we often become careless about our eating habits and this creates a storage bally fat.
I tried the third recipe and I rinsed really well, but I fee like it is still in my hair as if it did not rinse out. We have hard water, any suggestions.